Table of Contents
Pelican allows you to create a static blog. Most blog sites on the web are dynamic in the sense that the content of the site live in a database. In order to view a post on a blog, the server has to query the database, get the right content and then convert it into presentable HTML. However, in a static site, every page is pre-rendered by the static blog generator. This means that your entire blog can be uploaded to a server.
Here's a non-exhaustive list of why a static blog generator is good:
- Cheap Scaling: Pre-rendered static files can stand the onslaught of traffic if your post makes it to the top of hackernews or reddit very cheaply. No queries are being made.
- Any format: You can use reStructuredText, Markdown etc. to write your posts.
- Host Anywhere: Static sites can be hosted easily on github pages, Amazon S3 and even dropbox.
- Own Everything: You have access to all your posts and all your themes. No company in the middle, just you and your content.
- Control: Static site generators give you a lot of control over pretty much every aspect of your site through templates and plugins, allowing you to quickly add complex functionality not found in popular web blogging platforms.
- Update Issues: If you are using wordpress, you have to update your software when a new version comes out; otherwise, you have a security risk. However, one can use the same version of a static blog generator indefinitely.
Here's why pelican is a good choice in contrast with other generators: [1]
- Plugins: Pelican has a lot of plugins, that allow you to quickly add functionality.
- Hackable: Extending pelican as well as altering its behaviour is simple.
- Themes: Pelican has a lot of themes, and you can make your own.
- Multi-platform: Works well on Windows, OSX and Linux. [2]
I've been using Pelican as my static blog generator for the past year. Over this time, I have come to recognize its strengths and weaknesses. Pelican allows you to quickly get a themed site up and running in a matter of minutes. You can also choose to invest more time and create your own theme. In short, if you want a low hassle setup, its there and if you want a more custom site you can have that too.
However, Pelican's initial setup barely scratches the surface of what's possible with this small yet powerful blog generator. It has many plugins too for quickly adding extra functionality, like the support of other document formats; ipynb and asciidoc for example. Plugins also allow you to support things like MathJax in your pages and embed disqus comments. [3]
Getting Started
Before diving in, I expect you to know a few basic things:
- How to use git
- How to use bash or your shell of choice
- How to use Python
Installing Pelican
Installation is very simple:
$ pip install pelican
Feel free to use virtualenv if you want to but its not required.
Pelican works with both Python 2 and Python 3. However, I chose to use Python 2 because I use an automation tool called Fabric, which only supports python 2 (for the time being).
Basic Setup
When first beginning with pelican, one can choose to use the pelican skeleton generator to create a basic structure using pelican-quickstart. [4]
$ pelican-quickstart
Welcome to pelican-quickstart v3.5.0.

This script will help you create a new Pelican-based website.

Please answer the following questions so this script can generate the files
needed by Pelican.


> Where do you want to create your new web site? [.]
> What will be the title of this web site? Test Site
> Who will be the author of this web site? Kevin Kevinson
> What will be the default language of this web site? [en]
> Do you want to specify a URL prefix? e.g., http://example.com   (Y/n) n
> Do you want to enable article pagination? (Y/n)
> How many articles per page do you want? [10] 8
> Do you want to generate a Fabfile/Makefile to automate generation and publishing? (Y/n)
> Do you want an auto-reload & simpleHTTP script to assist with theme and site development? (Y/n)
> Do you want to upload your website using FTP? (y/N)
> Do you want to upload your website using SSH? (y/N)
> Do you want to upload your website using Dropbox? (y/N)
> Do you want to upload your website using S3? (y/N)
> Do you want to upload your website using Rackspace Cloud Files? (y/N)
> Do you want to upload your website using GitHub Pages? (y/N)
Done. Your new project is available at /Users/quazinafiulislam/Desktop/testingzone
There's no need to change much in the default quickstart wizard. Default values are indicated by [default] and (y/N), where the capitalized letter is the default value. Just one thing to note here is URL prefix; don't set it right now, set it when you actually want to take your site online, and we will go over how to do that later in this tutorial.
Your First Post
After pelican-quickstart is done, this is what the directory should look like:
.
├── Makefile
├── content/
├── develop_server.sh
├── fabfile.py
├── output/
├── pelicanconf.py
└── publishconf.py
Pelican supports reStructuredText out of the box. If you want to use another format like markdown then just install it:
$ pip install markdown
More uncommon formats will be discussed later. With this out of the way, we can create our first post inside the content folder. All our writing has to be inside the content folder, so we change our directory to the content folder:
$ cd content
My file is called first_post.rst and it looks like this:
first_post
##########

:date: 2014-12-13 18:32
:category: Test

Hello World from Pelican!
Basically, all one needs is a category and a date. A markdown version of the same post would be:
Title: first_post
Date: 2014-12-13 18:32
Category: Test

Hello world from Pelican!
This is what my project directory looks like now:
.
├── Makefile
├── content
│   └── first_post.rst
├── develop_server.sh
├── fabfile.py
├── pelicanconf.py
├── pelicanconf.pyc
└── publishconf.py
Now changing back to our project directory, we can start the development server, and see the generated blog post:
$ make devserver
Once this is done, we should be able to see our post on localhost:8000:
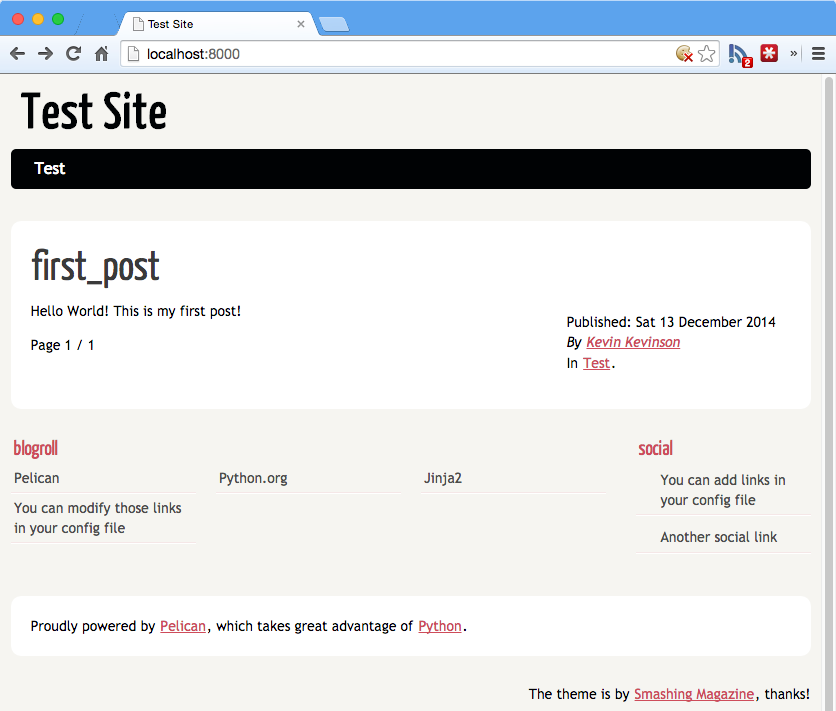
We can stop the server through:
$ make stopserver
Automation
Although only a title, date and category are required for a post, pelican allows you to add a lot more information like tags, authors and much more. However, creating a new file with the right date and time can be time consuming, so we can use certain tools to automate the task for us.
Vanilla Python
We can create simple scripts to automatically create our entries with the right date and time. Here is an example script that I use called make_entry.py:
import sys
from datetime import datetime

TEMPLATE = """
{title}
{hashes}

:date: {year}-{month}-{day} {hour}:{minute:02d}
:tags:
:category:
:slug: {slug}
:summary:
:status: draft


"""


def make_entry(title):
    today = datetime.today()
    slug = title.lower().strip().replace(' ', '-')
    f_create = "content/{}_{:0>2}_{:0>2}_{}.rst".format(
        today.year, today.month, today.day, slug)
    t = TEMPLATE.strip().format(title=title,
                                hashes='#' * len(title),
                                year=today.year,
                                month=today.month,
                                day=today.day,
                                hour=today.hour,
                                minute=today.minute,
                                slug=slug)
    with open(f_create, 'w') as w:
        w.write(t)
    print("File created -> " + f_create)


if __name__ == '__main__':

    if len(sys.argv) > 1:
        make_entry(sys.argv[1])
    else:
        print "No title given"
With this, making a new file can be created like so:
 $ python make_entry.py "New Post"
File created -> content/2014_12_13_new-post.rst
Fabric
Jump to the next section if you're not using Python 2 [5]
Using Vanilla Python is great, but imagine trying to make a script for every single task you need done. This would be a nightmare. Of course, one can keep using if-else statements to add more argument parameters but that is tiring and not very flexible (not to mention error prone). This is why one option to making scripts that can take in different parameters is to use a handy library called Fabric.
I use fabric for most of my tooling, since pelican already generates a fabfile.py. Getting a new command line function in fabric is very easy:
- If you don't have a
fabfile.py, create one. - Create a new function inside
fabfile.py - Run the function like so:
fab do_something - If the function has positional arguments,
fab do_something:True, False - If the function has optional keyword arguments
fab do_something:kill_p=True, be_happy=False
Installing Fabric is easy:
$ pip install Fabric
The body of the function to make an entry is the same as before:
# TEMPLATE is declared before hand, and all the necessary imports made
def make_entry(title):
    today = datetime.today()
    slug = title.lower().strip().replace(' ', '-')
    f_create = "content/{}_{:0>2}_{:0>2}_{}.rst".format(
        today.year, today.month, today.day, slug)
    t = TEMPLATE.strip().format(title=title,
                                hashes='#' * len(title),
                                year=today.year,
                                month=today.month,
                                day=today.day,
                                hour=today.hour,
                                minute=today.minute,
                                slug=slug)
    with open(f_create, 'w') as w:
        w.write(t)
    print("File created -> " + f_create)
However, this time we can call it like so:
$ fab make_entry:"New Post"
Fabric alternatives
There are tonnes of alternatives that allow you to make a simple command line interface quickly:
- Click : A simple to use CLI by Armin Ronacher.
- Clip : Like click, but newer, and has more features
- Argparse : This package comes with python by default. Its not the easiest to use package out there, but if you don't want to install a new package, then this should work fine.
All three work with python 3.
Themes
Using a Theme
Pelican has many themes to choose from its themes repository. These are the steps:
- Clone a theme repo, or if you want clone the entire themes repository.
- Inside
pelicancon.pyfile, change theTHEMEvariable, to the directory of your theme.
On a side note, if you're looking for a place where you can view a screenshot of all the different themes, this site has nice screen-shots of each.
For example, if you wanted to use the maggner-pelican theme:
- Clone it into your project directory,
git clone https://github.com/kplaube/maggner-pelican.git - Change the
THEMEvariable to'maggner-pelican'and you're done :)
Creating Themes
Creating themes in Pelican is well documented in their documentation about theme creation. Although creating themes is beyond the scope of this post (because there's a lot that could be said), here are a few pointers:
- Target one format, if you try to create a theme for multiple formats like both rst and md, you're doing to run into a lot of issues.
- Using preprocessors can be more effective than using raw css since they allow you create a single css file and provides you with a lot more flexibility.
- If you wish to embed disqus or google comments or other third party dynamic content, then I suggest that you use separate include files instead of plugins.
Settings
The Two Settings Files
By default, pelican comes with both a pelicanconf.py and publishconf.py. When you are writing content and wish to see a preview, the settings in pelicanconf.py are used. When you choose to publish, for example to github or some other place, the settings in pelicanconf.py and publishconf.py are used as pelicanconf.py is imported in 1 below:
#!/usr/bin/env python
# -*- coding: utf-8 -*- #
from __future__ import unicode_literals

# This file is only used if you use `make publish` or
# explicitly specify it as your config file.

import os
import sys
sys.path.append(os.curdir)
from pelicanconf import *  # 1

(...)
How Settings Work
By convention all settings are capitalized:
#!/usr/bin/env python
# -*- coding: utf-8 -*- #
from __future__ import unicode_literals

AUTHOR = u'Nafiul Islam'
SITENAME = u'fUNNY bLOG'
SITEURL = ''
If we take a look in the default theme, they are used like so:
{% if DISQUS_SITENAME and SITEURL and article.status != "draft" %}
<div class="comments">
<h2>Comments !</h2>
<div id="disqus_thread"></div>
<script type="text/javascript">
var disqus_shortname = '{{ DISQUS_SITENAME }}';
var disqus_identifier = '{{ article.url }}';
var disqus_url = '{{ SITEURL }}/{{ article.url }}';
(function() {
var dsq = document.createElement('script'); dsq.type = 'text/javascript'; dsq.async = true;
(...)
Here, SITEURL AND DISQUS_SITENAME are both settings that are described in either pelicanconf.py or publishconf.py. They appear as variables inside the jinja template. [6]
Most settings that we put into our settings files are used in the theme, however, some settings like DEFAULT_PAGINATION are used to determine other things.
Writing Content
Pelican supports reStructuredText as its default document format. However, there is also support for markdown, ipython notebook, asciidoc and probably much more. To write in any of these formats, one needs to install the plugin associated with the file extension, such as asciidoc_reader for the asciidoc format and pelican-ipynb for the ipython notebook format. [7]
I would suggest reStructuredText, since it has the most features and can offer many ways to extend the syntax with features such as directives and interpreted roles. For example, reStructuredText supports footnotes out of the box, whereas if one were to use markdown, one would need to install a separate plugin and attach it to pelican. [8]
However, pelican has many third party plugins for markdown documents as well so if you prefer using markdown, then please do so, I only recommend reStructuredText because its easy to extend.
Previewing Content
devserver
The default way to see a preview of the generated blog is to use make devserver, this regenerates your blog every time that you change your content folder. This option is a horrible way to preview your blog for a couple of reasons:
- You need to hit the refresh button in your browser to see the changes after a save. This can often get tiring.
make devserverruns two processes in background for no good reason, the processes log data into the console anyways, so why not just have a tool that generates your content and terminates when you hit ctrl + C ?- Furthermore, in the transformation from your chosen format to html, if you hit an error, the daemon that keeps transforming your files to html also stops, and the error is often buried deep inside the logs
livereload
We need a solution that does two things for us:
- Allows us to see live previews on each save without having to refresh the browser.
- Does not stop unexpectedly from an error.
- Has an easy to use CLI
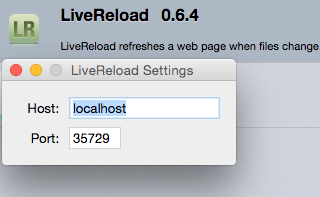
The solution is to use a neat little package called livereload and can be installed through:
$ pip install livereload
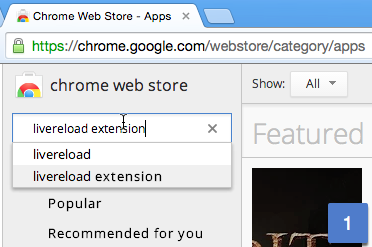
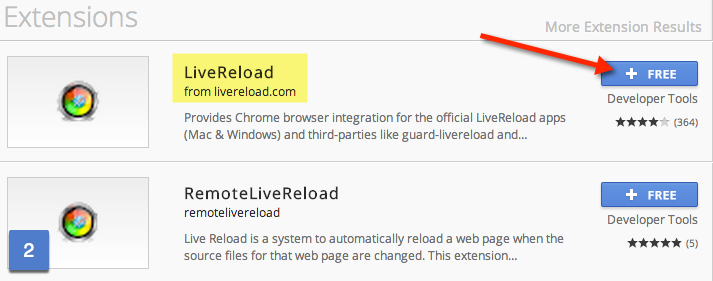
Once this has been installed, we need to install the livereload plugin for our respective browser. For example in chrome:
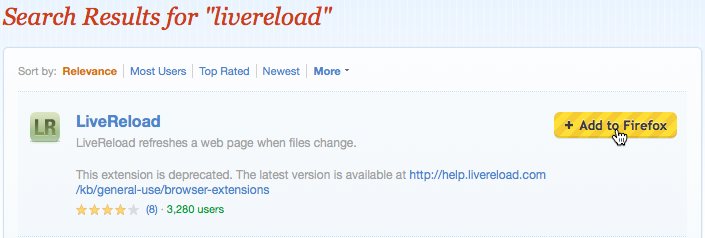
In firefox, we head over to addons.mozilla.org and search for livereload:
Once this has been installed, we need to run the livereload server. I do this by adding an extra function to my fabfile.py file:
import livereload

def live_build(port=8080):

    local('make clean')  # 1
    local('make html')  # 2
    os.chdir('output')  # 3
    server = livereload.Server()  # 4
    server.watch('../content/*.rst',  # 5
        livereload.shell('pelican -s ../pelicanconf.py -o ../output'))  # 6
    server.watch('../naffy/',  # 7
        livereload.shell('pelican -s ../pelicanconf.py -o ../output'))  # 8
    server.watch('*.html')  # 9
    server.watch('*.css')  # 10
    server.serve(liveport=35729, port=port)  # 11
We have a lot to explain here so lets begin with 1 and 2. In both 1 and 2, we use the local function from fabric. local allows us to run shell commands like cd. In this case, we are using the make command because pelican comes with a Makefile. If we involve make help from the command line in our project directory, we get the following:
$ make help
Makefile for a pelican Web site

Usage:
   make html                        (re)generate the web site
   make clean                       remove the generated files
So, in 1 we clean out output folder, and in 2 we generate our html files from our content.
In 3, we change the directory to our newly created output folder and in 4 we create an instance of the livereload server. In 5, we use the server.watch function to watch all the rst files since my content is written in reStructuredText. We can change this to ../content/*.md for markdown files for example.
server.watch had one required argument and two optional arguments. The first argument is filepath, the second is func, a function that you run every time watched files are changed. The last argument is delay, which delays function execution. [9]
In 6, we specify the function to be run as livereload.shell('pelican -s ../pelicanconf.py -o ../output'). The shell function from livereload allows us to run shell functions every time a watched file is changed. In this case, we ask pelican to remake our html files. Why was make html not used here? This is because the make command looks for a Makefile and we are right now in our output directory.
In 7, the server is directed to watch the "naffy" directory. The "naffy" directory is the directory that houses my theme; if any change is made to my theme, livereload refreshes the server. Replace "naffy" with whatever folder you are housing your theme in. If you're using the default theme, then do not add 7 and 8. 8 is the same as 6, we just rebuild the html.
In 9 and 10, the server is further instructed to watch html and css files that change within the output directory.
Finally in 11, we tell livereload to serve on port 35729. This is the default port for the livereload plugin [10]. The port variable is the port of the server serving the files, the liveport variable is a port that livereload uses to make changes directly to the HTML file.
Plugins
Using Plugins
Most plugins in pelican tell you how to install them. For example, the render_math plugin allows you to embed math inside your posts. Here's the basic gist of what you need to do in order to install them:
- Download the plugin package into your plugins folder, which is set inside your
pelicanconf.pyfile in thePLUGIN_PATHSvariable. - Then append the name of your plugin package inside your
pelicanconf.pyfile. [11] - Follow any other additional instructions that your plugin might have.
If just adding the name does not work, then one might consider adding <plugin_name>.<plugin_file>. [12]
Creating Plugins
Creating plugins in pelican basically means that you create a function to do your processing. You then register that function as a plugin. Creating plugins is well documented and an example of creating a reader is given.
In my use of pelican, more often than not, I've needed to create plugins that are process text in a given document, not add support for new document formats. So, I'll show you how I created a plugin for adding keyboard keys like alt and ⌘ .
I like to create my plugins as packages, but you can create them as simple files as well. So, inside our plugins folder, create a new package, and inside the package, we create a new file for the plugin:
$ cd plugins  # Or whatever your plugins folder is called
$ mkdir keyboard
$ cd keyboard
$ touch __init__.py kb.py
$ ls
__init__.py kb.py
Inside kb.py, we can need a function that modifies existing code, and a function that registers the function:
from pelican import signals

import logging
import re

logging.Logger(__name__)


def content_object_init(instance):
    """
    Provides the key plugin, make sure that you have Keys.css, http://michaelhue.com/keyscss/
    imported inside your HTML. How to use:

        So you hit [kb:CTRL] + [kb:ALT] + [kb:DEL] when in doubt

    Note, that light keyboard keys are enabled by default.
    """
    if instance._content is not None:  # 1
        content = instance._content
        new_content = re.sub(r"\[kb:(.+?)\]", r'<kbd class="light">\1</kbd>', content)  # 2
        instance._content = new_content
        return instance


def register():
    signals.content_object_init.connect(content_object_init)  # 3
In 1, we check if the article, page or blog post in question has content; essentially does it have a body. If we don't have a body, then we skip this object. In 2, replace with the corresponding stylized version, so that typing [kb:alt] will give you alt .
In 3, we register the function with pelican. Registering this plugin is simple, inside pelicanconf.py, we merely append to the list of PLUGINS:
(...)
PLUGINS += ['keyboard.kb']
(...)
I used key.css to style my keys, and I simply added the css file to my theme's article.html.
Once can create far more interesting plugins than the one I've shown, by looking at the plugin repository for more interesting plugins or even reading the documentation (although its not exhaustive in its explanations).
Hosting on Github Pages
Github is the best way to host your static blog. Some notable sites which get a substantial amount of traffic are hosted on github like Bootstrap, Yeoman, Pythonic Perambulations are hosted on github pages. If you don't have a github account, creating one is simple and quick.
Creating the repo
In order to get a site name like username.github.io, one needs to create a repo with that name on github, set the visibility to public and do not initialize with anything, you want an empty repo that you can push to.
ghp-import
ghp-import is a simple plugin that allows you to easily push your content to a github repo. You can install it using pip:
$ pip install ghp-import
There are two steps to doing this:
$ ghp-import output
$ git push git@github.com:<username>/<username>.github.io.git gh-pages:master
This will push the files in your output folder directly to the master branch of the <username>.github.io repository. It may take some time initially, but you will be able to see your fully generated blog on this domain.
Custom domains
In order to get your own top level domain like I have with nafiulis.me, you simply need to add a CNAME file with your domain. The CNAME file must me located inside your output directory and must only have the domain name. My CNAME file looks like this:
nafiulis.me
The CNAME file must be included when you are pushing to your github repo.
Once this is done, you need to link your domain up with github, and this is wonderfully explained in this article
Automating Publication
I use fabric to automate my publication, I just have two functions to do this:
def enter_dns_file():  # 1
    with open('output/CNAME', 'w') as f:
        f.write('nafiulis.me')


def github(publish_drafts=False): # 2

    try:  # 3
        if os.path.exists('output/drafts'):
            if not publish_drafts:
                local('rm -rf output/drafts')
    except Exception:
        pass

    local('ghp-import output')  # 4
    local('git push'
          'git@github.com:<username>/<username>.github.io.git
          'gh-pages:master') # 5
    local('rm -rf output')  # 6
In 1, the function enter_dns_file is used to insert the CNAME file into the output folder before pushing to github because in 6, we delete the entire output folder.
In 2, the github function is used to publish the content of the output folder to our github repo, with the option of publishing drafts which is False by default. The try-catch block in 3 is there to check if we have any drafts in the first place, and if the publish_drafts variable is True, then we publish them.
From 4 to 5, we push the content to the repository. Replace <username> with your username.
Acknowledgements
I would like to thank Ashwini Chaudhury, Karan Sikka, Mahmud Ridwan, Sahib bin Mahboob and Keiron Pizzey for proofreading this article before publication.
| [1] | Assuming that you are proficient in Python. |
| [2] | Don't use virtualenv, just use your base python when using windows. If using Windows, make sure that you have 2.7.9 or 3.4.2, both of which have "ensurepip". |
| [3] | Pelican has its own plugin repository on github. Please note however, that some plugins are defunct and are not supported by newer versions of pelican. |
| [4] | If you cannot access this, restart your virtualenv if you are currently in one. Otherwise use restart your shell. |
| [5] | Check out the wall of superpowers if this has changed |
| [6] | This piece of code is taken from the default theme that comes with pelican called "notmyidea" |
| [7] | The ipython notebook plugin is one example of a plugin that you can't find on the official plugin repository. This may be, because the plugin does not support the newest version, Pelican 3.5, since the plugin says that it required pelican 3.4 to function. |
| [8] | reStructuredText also allows for more versatile footnotes as well. Check out their quickstart guide. |
| [9] | Livereload has documentation on the server class on its documentation website |
| [10] | I cannot find the same options for chrome, hence I use firefox to see live builds of the generated site |
| [11] | In some documentation regarding plugins, the pelicanconf.py file is called settings.py. |
| [12] | Sometimes, Pelican packages do not import the functions necessary inside their __init__.py file. In this case you import one of the plugins's files. In most cases it is the file with a register method. |